To install an NIC, follow these steps:
- Check documentation to verify which NIC will match your expansion slots (PCI or PCIe) and the LAN requirements. Ensure that the adapter will work with the motherboard.
- Power down the computer and disconnect the main power cord from the machine.
- Following safe repair practice (proper grounding/anti-static strap), open the side cover of the computer to inspect available expansion slots.
- Match the connector/pinouts of the new NIC card and verify it matches the proposed slot.
- Remove the corresponding computer PCI option slot cover from the back panel.
- Line up the connector of the NIC to the expansion slot and seat it firmly as you guide the bracket up to the back panel of the computer, ensuring proper alignment. Tighten the new NIC with the screw that is usually supplied.
- Close the side cover of the computer following safe repair procedures.
- Reconnect the main power cord.
- Power up the machine.
要安裝NIC,請按照下列步驟操作:
1.檢查文檔以確認哪個NIC將與您的擴展插槽(PCI或PCIe)和LAN要求相匹配。確保適配器可與主板配合使。
2.關閉計算機電源,然後從計算機上斷開主電源線。
3.按照安全維修慣例(正確的接地/防靜電皮帶),打開計算機的側蓋,檢查可用的擴展槽。
4.匹配新NIC卡的連接器/引腳,並驗證它是否與建議的插槽匹配。
5.從背面板上卸下相應的計算機PCI選件插槽蓋。
6.將NIC的連接器對準擴展插槽,並在將支架向上推至計算機的背面板上時將其牢固就位,以確保正確對齊。用通常提供的螺釘擰緊新的NIC。
7.請按照安全維修步驟關閉計算機的側蓋。
8.重新連接主電源線。
9.打開機器電源。
After the NIC hardware is installed, the drivers should install automatically, depending on the operating system. For Windows (Vista/Win7/Win8.1/Win10), verify connectivity in the network and sharing center. For Linux, go to network settings, and search online for the appropriate driver depending on the Linux distribution , such as Red Hat Linux or Ubuntu).
安裝NIC硬件後,驅動程序應根據操作系統自動安裝。對於Windows(Vista / Win7 / Win8.1 / Win10),請驗證網絡和共享中心中的連接。對於Linux,請轉到網絡設置,然後根據Linux發行版(例如Red Hat Linux或Ubuntu)在線搜索適當的驅動程序。
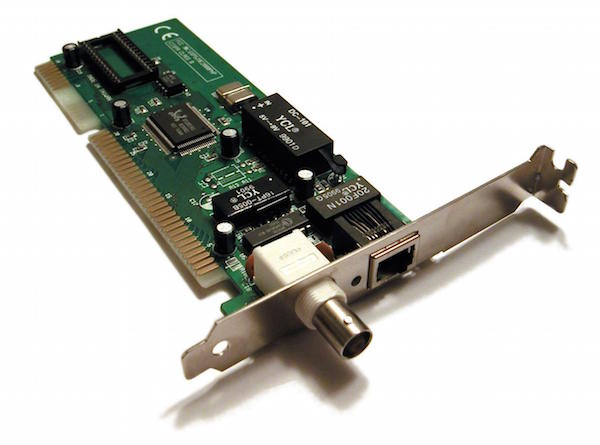
NIC with coaxial port. Photo used under CC-BY license from Commons.
帶有同軸端口的NIC。照片由Commons使用CC-BY許可。
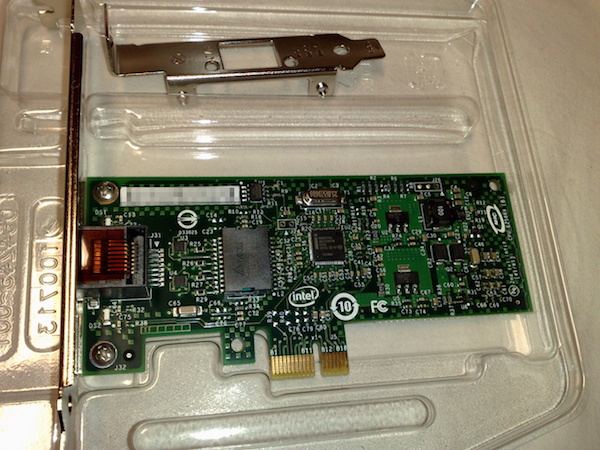
Intel 82574L gigabit Ethernet NIC PCI express x1 card. Photo used under CC-BY license from Commons.
英特爾82574L千兆位以太網NIC PCI Express x1卡。照片由Commons使用CC-BY許可。
In the lab below, you should install a new network interface card (NIC). In doing so, be sure that the card has the right pinout. Also, be sure to use proper ESD precautions.
在下面的實驗室中,您應該安裝新的網絡接口卡(NIC)。這樣做時,請確保卡具有正確的引腳排列。另外,請確保使用適當的ESD預防措施。
Network Devices(網路裝置) <<
Previous Next >> HW2